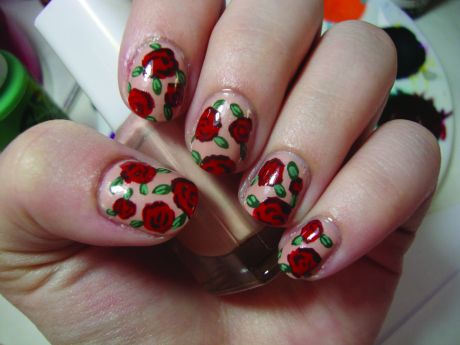
A simple floral print nail art design, perfect for spring! This eye-catching design will surely bring a vintage look to any outfit.
Step 1:

Start by painting your nails with a nude beige nail polish.
Step 2:

Using a small nail art brush, create a few circles on each nail. The circles don’t need to be perfect.
Step 3:

Using a thinner brush and a dark red nail polish, carefully outline each rose, then do several smaller C-shapes within the circle to suggest petals.
Step 4:

Using the same thin brush and a dark green nail polish, lay the brush down on your nail to make ovalshaped leaves around each rose.
Step 5:

Using the same thin brush and a lighter green nail polish, add some details to the leaves.
Step 6:

Finally, apply a top coat to your nails to seal in the design.
Ta-dah!

Check out tons more snazzy nail art tutorials in Catherine Rodgers’ DIY Nail Art!

2013 by Catherine Rodgers. All rights reserved. Excerpted from DIY Nail Art with permission from F+W Media.


