Photo by Megan Senior
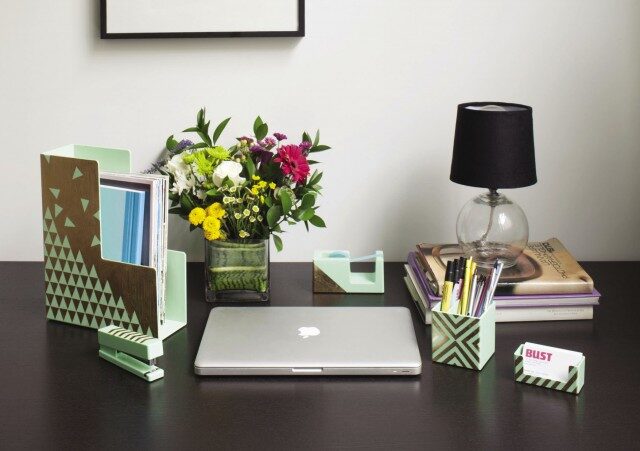
Want to add a little pizzazz to your desk? (Or really, just about anything in your house?) Add gilded detailing to any basic object with metal leaf paper and watch everything you touch turn to gold.
What You’ll Need
- Acrylic gloss medium
- Gold leaf adhesive
- Imitation gold leaf sheets (We used Mona Lisa Metal Leaf Starter Kit, which includes adhesive, gold leaf paper, and sealant; $10.99, Michaels.com)
- Masking tape
- X-Acto Knife
- Cutting mat
- 2 Paintbrushes
- Disposable gloves
- Cheesecloth
Instructions
- If you are decorating a porous surface like wood, you will need to seal it using a paintbrush and acrylic gloss medium. Let dry completely.

- Use masking tape to mark off your design by cutting the tape into strips or shapes with an X-Acto knife on a cutting mat. When creating your design, keep in mind that the negative space will be gold, not the area covered by tape.

- Place your tape shapes on the object in your desired design. Once you have the design the way you want it, make sure all the tape edges are pressed firmly down. Tape off any of the object’s edges that you want to keep free from gold.
- Use a paintbrush to cover the entire surface, including the tape, with a light coat of gold leaf adhesive. Wash the paintbrush immediately after using, and let the adhesive dry until it is tacky to the touch, about 20 to 30 minutes.

- Put on disposable gloves and gently place the gold leaf paper onto the surface; cover the entire area with gold leaf.
- Using a piece of cheesecloth, press down on the gold leaf to smooth out all the wrinkles.

- Wait 30 minutes and then carefully remove the tape, using the tip of the X-Acto knife to help lift the tape if needed. If there are any holes you want covered, press a small piece of gold leaf over the exposed space (it will adhere to the gold leaf already in place) and then smooth it down with the cheesecloth.
- Use a clean paintbrush to coat the entire surface with acrylic gloss medium or sealant, and let dry for 24 hours.
—
By Callie Watts
Photos by Megan Senior
This article originally appeared in the April/May 2016 print edition of BUST Magazine. Subscribe today!
More from BUST
These DIY Lip Scrubs And Balms Give Your Lips Some TLC

