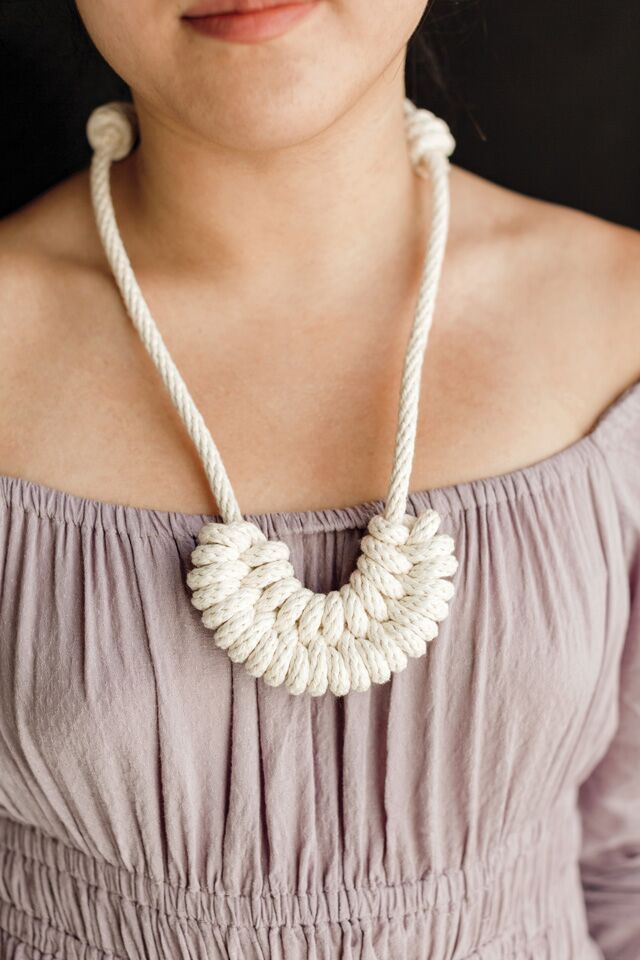
Windy Chien was sweeping up sawdust in her backyard woodworking shed when she had a “lightbulb moment.” The former record-store owner (she ran San Francisco’s famous indie shop Aquarius Records) turned Apple employee had quit her corporate job to focus on her own creativity, but wasn’t exactly sure what that meant. Having dabbled in macramé, this idea struck her: a year of knots. She decided to learn a new knot every day for a year, documenting it all on Instagram and now in her new book, which features all kinds of cool DIY projects, including this sweet adjustable semicircle necklace. All you need is rope! And patience.
Materials
15′ of 1/4″ (6-mm) cotton braid
Instructions

1. On a tabletop, measure out 4’ of the cord, and fold from this point back about 1’, forming a skinny horizontal loop. Begin knotting here. With the longer part of the cord, wrap one tight turn around the upper strand of the loop, then pulling the cord back to front through the loop. The shorter part of the cord is called the “standing” cord, because it isn’t actively doing anything—it’s just standing there. The longer end of the cord, the one that will be winding around and making the knots, is called the “working” cord, as it will be doing most of the work.

2. Hold the turn tight against the tabletop with your left fingers, then wrap two turns around the lower strand of the loop using the working cord, again ending by drawing it back to front through the loop.

3. Continue these same three turns working toward the right, alternating between one turn on the upper strand, then two turns on the lower strand. Make tight turns; use your fingers to hold them down.

4. You want about 12 turns on the upper strand. Make sure the last two turns are on the lower strand.

5. Pull the lower strand of the loop to the right, compacting the double turns tightly.

6. Now pull the standing part, or upper strand, to the left, compacting the single turns and causing the knot to curve. Pull until the end of the loop disappears to create a semicircle. Secure the ends of the necklace with a Triple English Knot using the next set of instructions.
The Triple English Knot

1. Decide how long you want the necklace to be. I do this by putting it “on” and holding the long cords together at the back of the neck. This overlap point is where you make the Triple English Knot. Lay the necklace ends horizontally parallel, their ends pointing in opposite directions. The working cord will be the one on the left, and it will be below the cord coming from the right, the standing cord. Using the working (lower) cord, wrap a slightly loose turn over the upper cord from front to back, emerging from behind both legs and a bit to the left of the turn.

2. With this same working cord, wrap two more turns around both cords, to the left of the first turn you made, ending with the working cord hanging down behind both strands. Hold the turns in place with your fingers. They should be slightly loose.

3. This is the tricky part. Feed the working cord from the left to the right through the inside of all three turns. In doing so, the working cord will run parallel to the standing cord inside the coils, and will emerge above the standing cord. Using your fingers, work the slack out of the turns so they are tight, then tug on the two parts of the working cord, pulling them apart as tightly as you can. There’s no need to tug on the standing cord.

4. Flip the entire necklace over horizontally, so that the knot you just made is on the left. What was the standing cord now becomes the new working cord, and it will be below the standing part. Make the Triple English Knot again, this time using the new working cord to make turns around the standing cord. The instructions are identical: Start with the working cord below and parallel to the standing part, then coil it over and around the standing part three times, emerging from behind both cords.

5. When both halves of the Triple English Knot are made correctly, they’ll nest together neatly. The two halves of the knot can be slid apart to shorten the necklace.

Excerpted from The Year of Knots by Windy Chien
Published by Abrams
Intoduction by Lisa Butterworth
Photographed by Vero Kheria
This article originally appeared in the September/October 2019 print edition of BUST Magazine. Subscribe today!
More from BUST
Make Your Own Statement Barrettes In 4 Steps
These Dreamy Accessories Will Keep You On Cloud Nine
This Bold And Easy Eyeliner Look Will Make You Draw Your Own Lines


