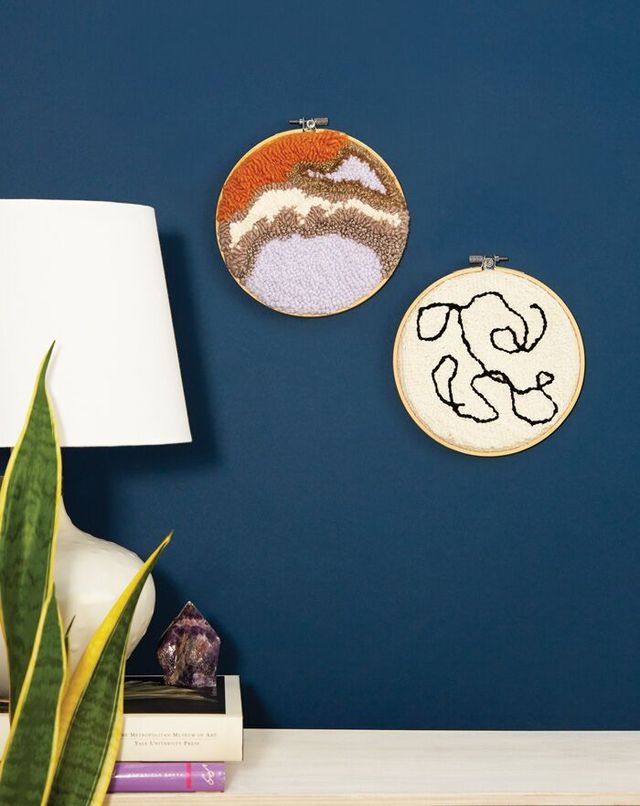
Punch needling is a textile technique similar to rug hooking, but easier. A special punch needle creates loops of yarn in cloth, which are held in place by the tension of being so densely packed. Make up an abstract design as you go, and display the end result in an embroidery hoop, or sew into a cushion cover, tote bag, an oven mitt, or, on a larger scale, even a rug. The technique takes a little practice, but once you’ve got it down, you’ll be obsessed.
What You’ll Need
Plastic snap frame (8″ x 8″ or larger)*
6″ wood or plastic embroidery hoop (for display)*
Oxford punch needle #10**
Monk’s cloth (at least 10″ x 10″)**
Yarn (in your chosen colors)
Black pen
Scissors
Optional: Paper for transferring a pre-planned design
* Available at major crafting supplies stores
** Available on etsy.com
Instructions
1. Assemble plastic frame. Center monk’s cloth (making sure the weave is straight) on top. Secure with clamps, one on each side. Tighten cloth by twisting clamps away from each other, two at a time. A taut surface is crucial! If the cloth goes slack while punching, twist clamps to retighten (A).
 A
A
2. Using the pen, lightly outline the inner circle of your embroidery hoop on the front of the cloth (B). (To plan a design, do this step on paper. Draw a simple design inside the circle. Cut the paper so it fits underneath the cloth. Hold the frame up to light and use black pen to lightly trace the design, circle included, on the front of the cloth.)
 B
B
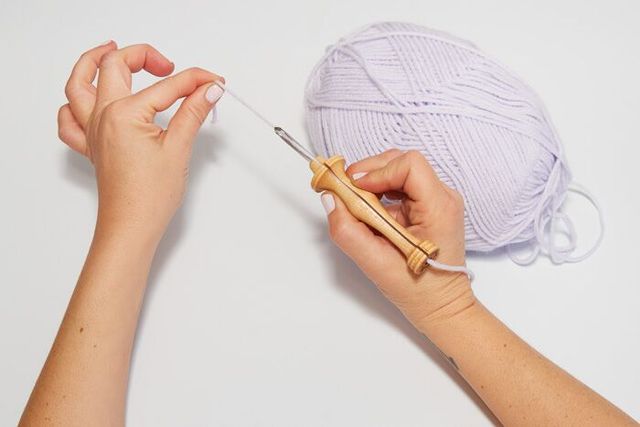
3. The hollow punch needle has one hole at the base of the slotted handle and another hole at the tip of the notched needle; the yarn flows through the handle to the end of the needle. To thread the punch needle, poke the tail of your yarn down into the needle’s hole, pulling a few inches of yarn through. Hold onto the tail with your non-dominant hand, and use your dominant hand to draw the strand of yarn down to the end of the handle along the slot. Pull on the tail until the yarn strand is forced down into the slotted handle (C), then pull on the yarn at the rear end of the handle until there’s just a short tail poking through the needle.
 C
C
4. Rules for punching: the slotted side of the handle should always be facing up, the needle should move forward in the direction you’re punching, and the yarn must be able to flow freely through the handle slot and out the end.
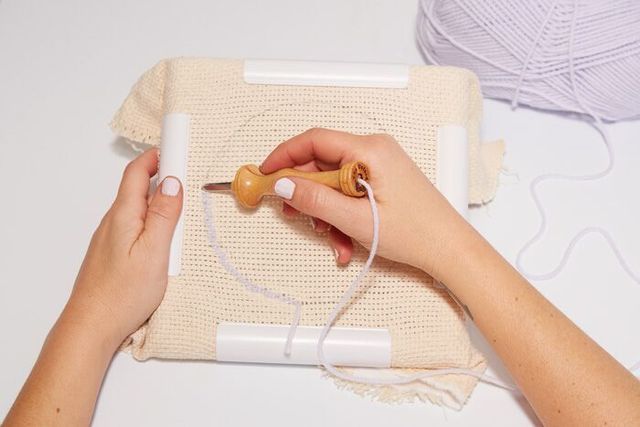
5. Punch your design by section/color. Starting along the edge of the circle, push the needle down into the cloth all the way to the base of the handle. Always punch all the way down. Gently pull the needle back up until the tip is barely grazing the top of the cloth. (Lift too high, you’ll pull the stitch out.) Drag the tip of the needle across the cloth about 1/8″ and punch your next stitch. Aim to punch 6 to 8 stitches per inch, but don’t worry about only punching the natural holes in the weave—just punch (D).
 D
D
6. Outline the section/color first, working toward the center. If your design has any hard angles, turn your needle while it’s punched down, so when you pull it up, it’s facing in the right direction.
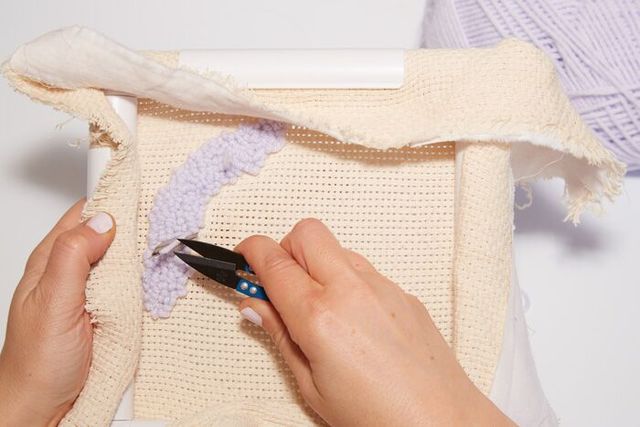
7. On the last stitch of your first section/color, leave the needle punched down then flip over the frame so you can see the needle tip poking through on the looped side. Cut the yarn on the underside of the hole to free the punch needle (E).
 E
E
8. Repeat steps 3 through 7 to punch the rest of your design. After your entire design has been punched, use the tip of your needle to poke any loose yarn ends to the underside of the cloth (F). Flip the frame over and trim the yarn ends and any uneven or messy loops to the same height as the rest of the design (G).
 F
F
 G
G
9. Remove your punch needle piece from the frame, position it inside the embroidery hoop with the looped side facing front, and tighten into place (H). Cut the excess cloth and tuck or tape toward the back of the frame. Hang!
 H
H
By Amelia McDonell-Parry
Photographed by Patricia Lopez Ramos
This article originally appeared in the January/February 2019 print edition of BUST Magazine. Subscribe today!
More from BUST
Make This Boho Macrame Wall Hanging With Just A Few Simple Knots

