
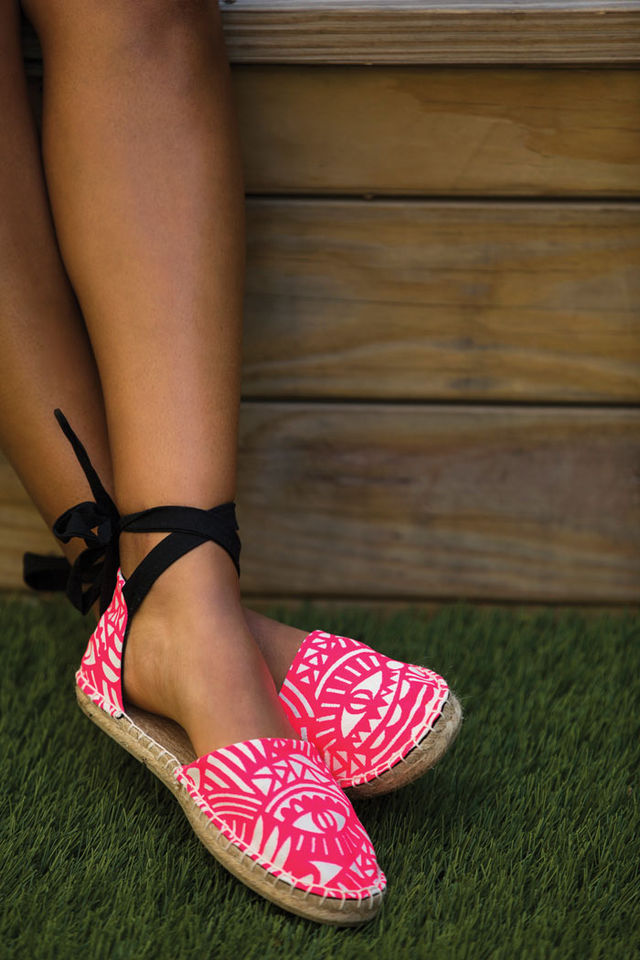
Espadrilles—the classic footwear for hot sand beaches, breezy summer strolls, cold drinks on sunny patios, and lazy days in a hammock—have been keeping a big secret: They’re surprisingly easy to make yourself! Say what?! Yep, this casually stylish shoe, originally conceived by the Catalan peasants of Spain as far back as the 1300s, is easy to pull together in a crafternoon. So grab your sewing machine and materials and put your best foot forward.
Materials
One pair of espadrille shoe soles in your preferred size*
¼-yard cotton-linen or canvas fabric (for outside of shoe)
¼-yard cotton fabric (for inside of shoe)
4 pieces of cotton fabric cut into 2″ by 17″ rectangles (for straps)
One package of espadrille yarn or cotton baker’s twine*
Espadrille hand-sewing needle—curved or straight*
1 yard fusible lightweight interfacing
Espadrille wax* or beeswax candle
Chopstick
Pins
Iron and ironing board
Sewing machine and standard sewing supplies
*=Available from Amazon, or as part of a complete kit from ahappystitch.etsy.com
Preparation
1. Print out the pattern at bust.com/ downloads and cut out in your size.
2. Use pattern to cut fabric for the toe: 2 pieces of the outside fabric, 2 pieces of the inside fabric, and 4 pieces of interfacing. Repeat for the heel.
3. Using package directions, fuse interfacing to wrong side of each fabric piece.
4. Use a marking tool (or pencil) on the wrong side of the interfaced heel to mark the lines noted on the pattern.
Sewing
Make the Toe:
Pin the inside fabric to the outside fabric, right sides together, and sew edge with a 3/8″ seam allowance, leaving a 3″–4″ opening along one side. Clip the seam allowances at the corners (A). Turn the toe right-side out, use a chopstick to push out corners, and press flat with iron. Sew opening shut. Repeat for second toe piece.
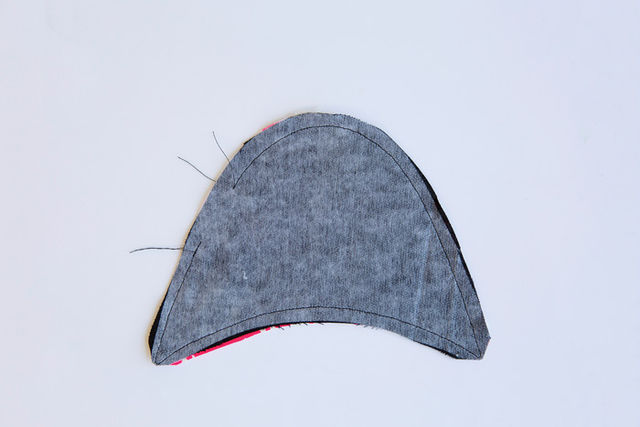 Image A
Create Straps:
Fold strip of fabric in half lengthwise. Sew a ¼” seam allowance along the long side and one short side. Turn the strap right-side out by nestling the chopstick into the sewn short end of the strap and push until the sewn end travels all the way through the open short end (B). Repeat for the three remaining straps and press all four nice and flat.
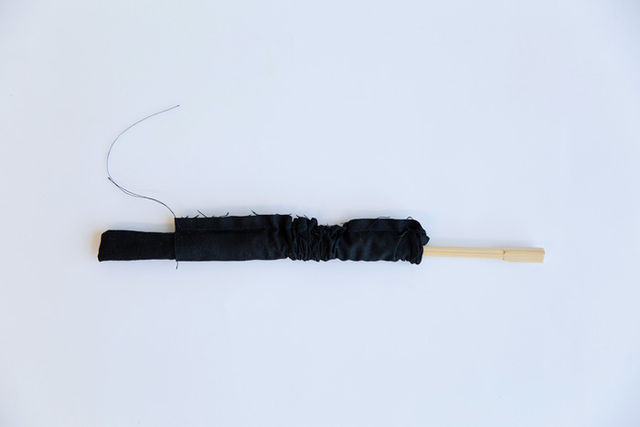 Image B
Make the Heel:
Pin two straps with the open ends aligned with the sides of the heel, in between marks on fabric (C).
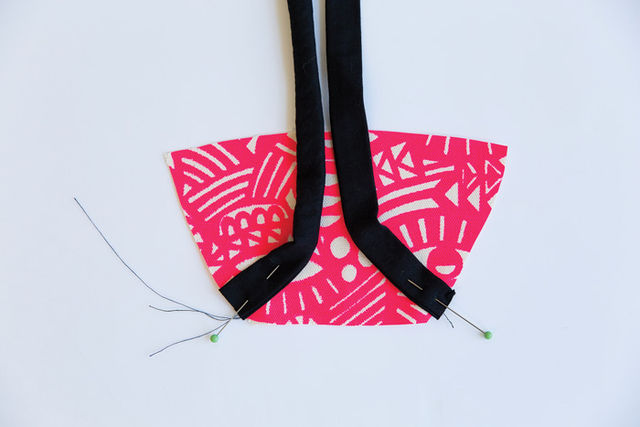 Image C
Sew with a ¼” seam allowance to hold in place. Place the inside and outside fabric right sides together (leave the straps sandwiched inside) and sew at a 3/8″ seam allowance, leaving an opening of 3″–4″ along the bottom edge (be sure the straps are placed through the opening and watch that you don’t sew over them) (D). Clip the corners and turn right sides out, pushing out the corners with your chopstick. Press flat with an iron, then stitch the opening closed. Repeat for second heel.
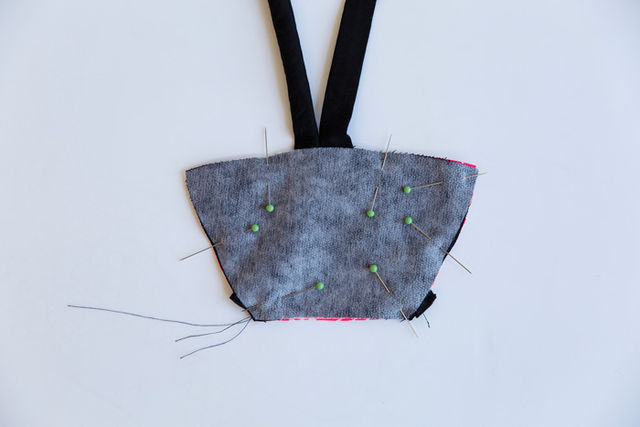 Image D
Attach Fabric to Sole:
Pin the center back of the heel to the sole, in the middle of the heel area. Place pins, grabbing ¼” of fabric and pushing into the jute of the sole, every 3/8″ (E).
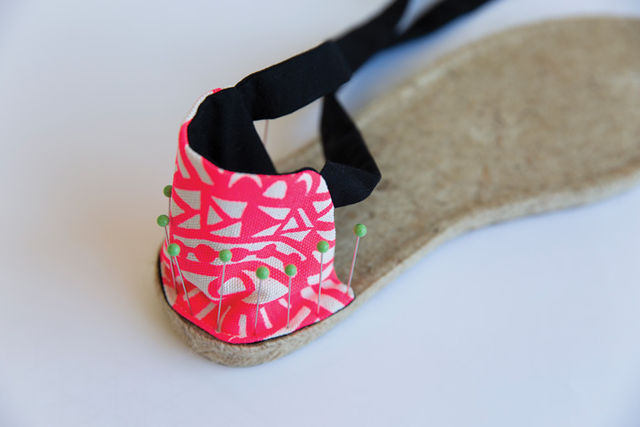 Image E
Do the same with the toe, beginning by pinning the center front of the toe to the front of the shoe sole; place a pin every 3/8″.Cut 90″ of espadrille yarn and knot one end. Run yarn along the wax and rub with your fingers (to keep it from getting tangled). Thread the needle. You’ll use a blanket stitch to attach the fabric to the sole. Beginning at one edge of the toe, put the needle about halfway into the jute of the sole, then ¼” up into the fabric (F).
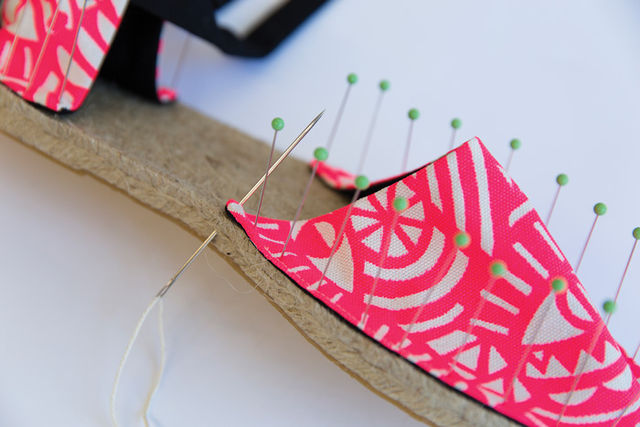 Image F
Pull thread through tightly so the knot nestles into the sole. Take one additional looping stitch (put the needle into the jute first and back up where you came out with the original stitch) to really secure. For your next stitch, place the yarn to the right of the stitch you just made, then run the needle up through the sole, into the fabric about ¼” up, and make sure the needle is in front of the thread (G).
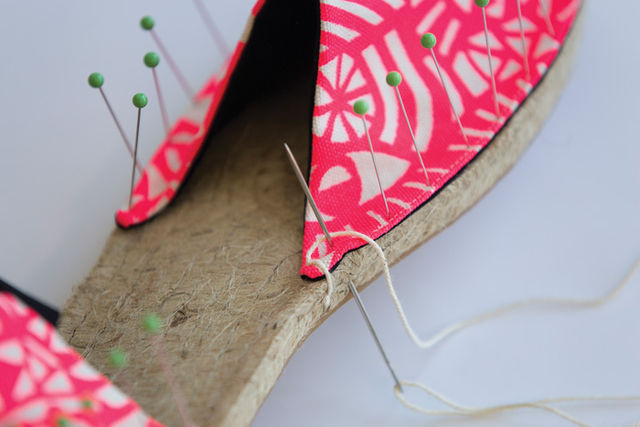 Image G
Pull the thread snugly. This is the blanket stitch. Repeat step 4 until you get to the end of the toe. At this point, you will want to add a securing stitch, as follows: set the needle into the fabric and down into the jute (H), then pull the thread taut.
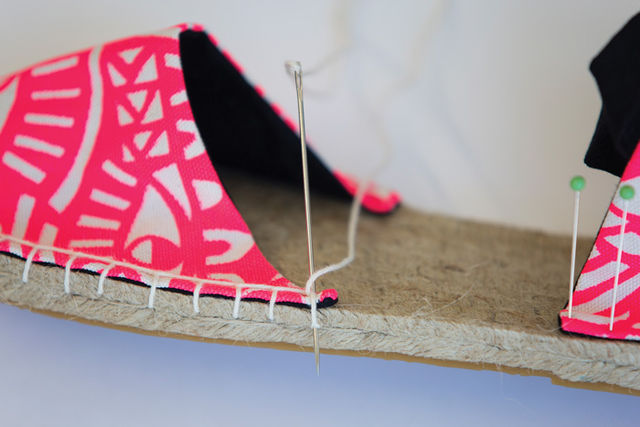 Image H
Place another stitch in the same location with the needle pushed into the jute and up into the fabric. Continue on with the standard blanket stitch across the sole (stitches will go into the jute only) until you reach the heel (I).
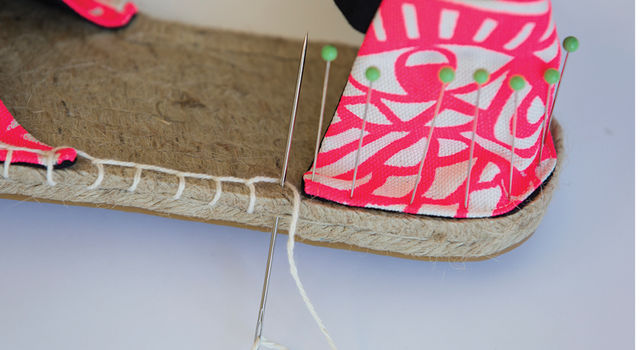 Image I
Create a securing stitch at the beginning of the heel as in step 2, work blanket stitch across, and add another securing stitch at the end of the heel, as in step 5, then continue blanket stitch along the sole. ? Once you return to the starting point, stitch 2 stitches in place, push the needle into the fabric and down through the jute, pull snug and tie a knot. ? Repeat blanket stitch for second shoe. Voila! Shoes!
By Melissa Quaal
Photographed by Seher Sikandar
Model: Janeth Gonda
This article originally appeared in the August/September 2018 print edition of BUST Magazine. Subscribe today!
More from BUST
Make This Boho Macrame Wall Hanging With Just A Few Simple Knots

