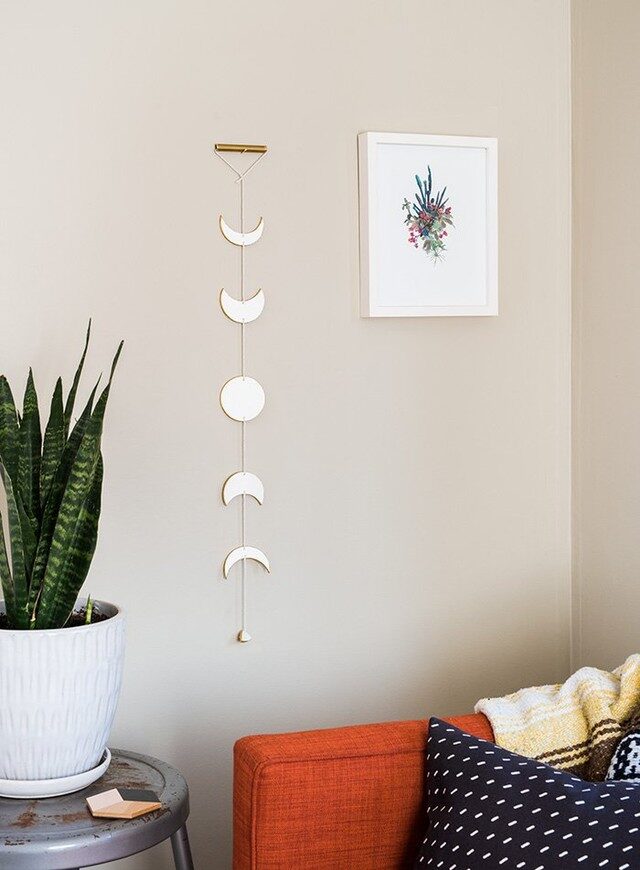
Over the Moon
Show your lunar love with this astronomically easy wall hanging
Whether you’re a moon phase enthusiast or just like the celestial body’s graphic appeal, this super simple wall hanging will spruce up any space. And you don’t need to be a rocket scientist (or a heavy-duty DIY-er) to make it—just grab some clay and a cookie cutter and you’ll be moon walking through this project in no time.
Materials
– 1 package air-dry clay ?(available at art supply stores)
– Rolling pin
– Round cookie cutter ?(ours had a 2½” diameter)
– Skewer
– Gold metallic paint
– Small paintbrush
– Brass tube (cut to 3”, available ?at most hardware stores)
– Twine
INSTRUCTIONS
1. Roll out clay till it’s about 1/8” thick. Cut 5 circles with your cookie cutter. Leave one shape as is (for your full moon). For the shape nearest the full moon, use your cookie cutter to cut into the circle about 1/3 of the way. Lay this new shape on top of another full circle, and use the cookie cutter to cut the circle below it, so the pieces are identical. Repeat for the two crescent moon shapes, but use your cookie cutter to cut into a full circle ¾ of the way. Use the cookie cutter and a scrap piece of clay to make a small bowed triangle to hang at the bottom.
2. Use your skewer to gently poke a hole through the center of the top and bottom of each moon shape, a few millimeters from the edge. Poke each hole from the front to the back, to keep your surface as smooth as possible. Poke only one hole in the top of the triangle shape. Lay your shapes flat and let dry according to the clay package instructions (typically overnight).
 Steps 1 & 2
3. Once hardened, paint the backs and sides of each piece using your paintbrush and paint. Let dry.
4. Cut a length of twine 2½ to 3’ long. Thread one end through the brass tube and knot the end to the tail. Slip the top crescent moon shape (points up) onto the twine, threading it through the top front. If your twine is thick enough to hold the shape in place, continue to the next step. If not, adjust it to your desired place (we put ours about 5” from the brass tube) and secure by tying a knot.
 Steps 3 & 4
5. Thread the twine through the bottom back of the crescent moon and repeat with each shape in order, making sure the length of twine between them is even before you tie the knot. (If the end of your twine begins to fray, wrap a tiny piece of Scotch tape around it for easier threading.)
 Step 5
6. Thread the final triangle-shaped piece onto your hanging front to back, knot the twine if necessary, and trim. –Lisa Butterworth
Photographed by Julia Stotz
More from BUST
This Sunset Cushion Cover Will Bring Some Brightness To Your Home: DIY
Here’s How Victorian “Science” Explained Cat Ladies
5 Ways To Travel The World While Staying In Brooklyn

