Photo by Megan Senior
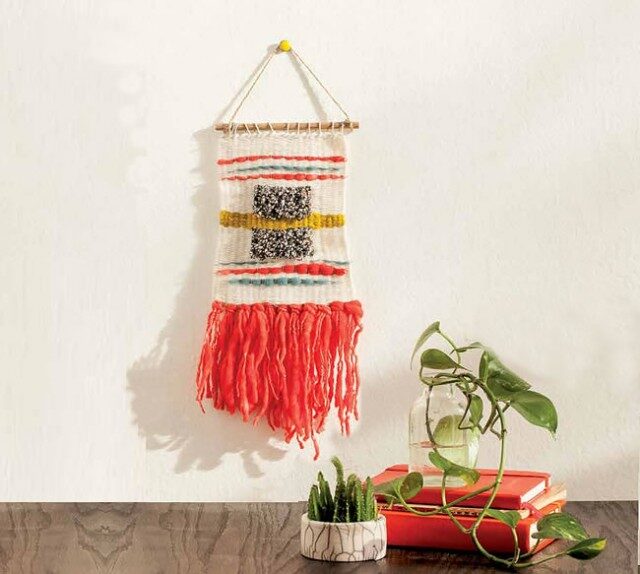
A WOVEN WALL hanging makes for awesome décor, and it’s way easier to create than you think. You can even make your own loom with just a frame and some nails! It’s the perfect meditative craft for when leaving your warm and toasty home is the last thing you want to do. It’s also the best way to use up all that random yarn you’ve accumulated. This weaving is small, but you can scale it to any size you want. Soon, you’ll be a regular threadbanger!
WHAT YOU’LL NEED:
• Assortment of yarn (any color, texture, or type will do)
• Cotton warp twine
• Wool roving
• Scissors
• Crafting needle
• Rod or dowel measuring the length of your weaving
• Chopstick or pencil
• Canvas stretcher frame (any size)
• Nails (headless nails work best)
• Hammer
FRAME LOOM: To create your frame loom, assemble the canvas stretchers into a square. Then hammer nails ½” apart along the top and bottom of the frame.

1) WARPING: Warp refers to the thread that runs lengthwise up and down on the loom. Tie one end of the warping twine onto the top left peg. Wrap your warping twine onto the frame loom, going down and up around each peg creating a taught zigzag across the frame. When you get to the last peg tie the warping twine tightly.
2) THREAD YOUR NEEDLE: Cut a 4′ long piece of yarn and thread it onto the tapestry needle. This yarn will be the weft (the yarn that runs under and over the warp from side to side).
3) WEAVING: Now you are ready to start weaving! Beginning at the bottom, use your needle to go over and under the warp thread alternating each time. Pull yarn through, leaving 2″ hanging out at the beginning. Next, weave the opposite way on top of the warp, going under and over, pushing your weft in place. Pull yarn taught but not too tightly or your weaving will bend inward. This plain weave is the main structure of the weaving, so continue through-out. Try different colors (see changing color) and textures (see fringe, wool roving, and loops) or skip some warp threads while weaving. You can weave any shape or design you wish, but feel free to use the finished piece on the previous page as inspiration.

4) FRINGE: To add tassels or fringe, cut a handful of yarn double the length of the de-sired tassel length. Take a group of 3 to 5 strands, depending on the thickness of the yarn. Place the doubled fringe yarn (creating a loop) under one of the warp threads. Grab the ends and pull them tight through the loop creating a loop knot. Slide the tassel down and repeat on every other warp thread. Once you have added your desired fringe continue your plain weave on top and in-between tassel layers.

5) WOOL ROVING: To incorporate roving (fat, unspun wool that comes in bundles), use your fingers to pass it through like a regular weave. Add a plain weave on top to lock it in.
6) CHANGING COLOR: To change colors, yarns, or if your length of yarn runs out, just tie new yarn onto the weft and push the knot to the back of the weaving. Continue with the plain weave.

7) LOOPS: To create loops, pinch weft on top of the warp thread and pull up, making sure you have left enough slack. Slide chopstick or pencil under the loop and back up. Pinch the next weft thread that is on top of the warp and repeat chopstick process. Once you have your desired length of loops, weave 2 rows of plain weave to lock it in. Pull chopstick out and repeat with the next row.

8) FINISHING: Tuck any loose threads into the back of your weaving. Thread the extra slack through the needle and tuck it under a series of 3 wefts, lengthwise. Slowly weave your dowel into the top of your weaving and push it all the way up. Gently remove your weaving by lifting up and off of the loom. If your weaving is strung too tightly, some pegs may need to be removed.
—
By Stefanie Fuoco
Prop Stylist: Vicki McIsaac
For inspiration, check out Stefanie’s weavings on Instagram @crepesforbreakfast.
This article originally appeared in the February/March print edition of BUST Magazine. Subscribe today!
More from BUST
Plug In With The DIY Tech Superstar of Adafruit Industries: BUST Interview
3 Tea Drinks That Aren’t For Tea-Totallers

