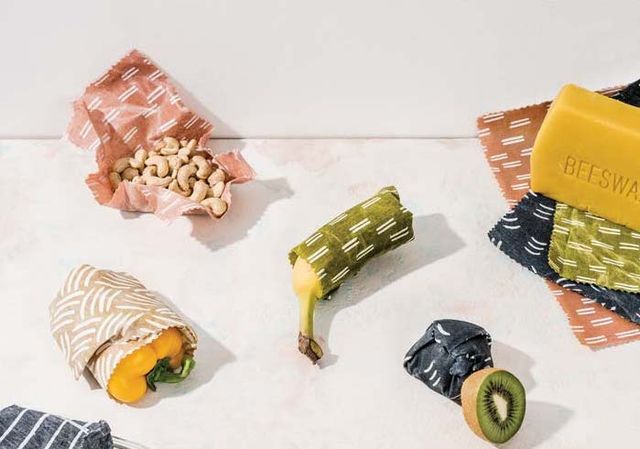
If you’ve stopped collecting plastic forks and disposable chopsticks, you’re one step closer to greening your kitchen. Some items, however, are harder to let go—like cling wrap. It’s just so easy and convenient! But infusing fabric with beeswax does a similar trick, creating malleable wraps that can cover cut fruit and veggies, hold a snack, or pack your favorite sammie. And the result is way cuter. Beeswax is naturally antibacterial (for a vegan version, you can sub candelilla wax, though the end result is less pliable), and when your wraps start to wear out, you can just re-wax them for longevity. Wax on!
Materials
Cotton, linen, or hemp fabric (we used Erin Dollar’s Balboa collection for Robert Kaufman Fabrics)
Ruler
Pinking shears
Beeswax block or pastilles (or candelilla wax)
Cheese grater
Parchment paper
Baking sheet
Paintbrush
Tongs
Instructions
1. Preheat your oven to 200 degrees and cover a baking sheet with parchment paper.
2. Cut your fabric to your preferred size, using pinking shears so the edges won’t unravel. We cut pieces in a variety of sizes, including 8″x8″ and 10″x10″ (below).

3. If you’re using a block of beeswax, grate a couple of handfuls using a cheese grater. Place a fabric swatch on the baking sheet and sprinkle the wax shavings or pastilles in a thin layer evenly over the fabric, making sure to cover the edges as well. (A 10″x10″ piece will need about two tablespoons of shavings.) (Below)

4. Pop the baking sheet into the oven for 3 to 5 minutes to melt the wax, then pull the baking sheet out and use a paintbrush to even out the wax on the fabric. If there are spots that have not been infused with wax (they’ll still look dry), add some more wax and pop the fabric back in the oven for a couple more minutes. (Below)

5. Once your fabric swatch is infused, lift it with tongs (or your fingers, it’s not that hot) and drape it somewhere to dry (I used the back of a chair). Refrain from storing meat in your new wraps, and wash them gently with lukewarm water and soap when necessary.
By Lisa Butterworth
Photographed by Julia Stotz
This article originally appeared in the October/November 2018 print edition of BUST Magazine. Subscribe today!
More from BUST
How To Arrange Flowers, Freakebana-Style
Stitch The Crap Out Of Your House And Wardrobe With This DIY Sashiko Book
Go Green With These DIY Living Air Plant Accessories


